Add Time Using “My Timesheet”
The timesheet view shows tasks for which you are assigned responsible or has an existing time entry during the report's viewed time period. Time entries can be added or edited for non-summary tasks (those not in bold) by clicking in the particular date column on that task's row.
NOTE: Time tracking must enabled to use the My Timesheet report. To learn how, check out Enable Time Tracking.
Using the Timesheet
Access the timesheet by clicking the user profile picture (or user initials) in the top right and then select My Timesheet (or from the top navigation bar Reports, under the TIME TRACKING section on the left, select the My timesheet link).
To add/edit multiple items at once, click the Add Multiple Time Entries button (which only appears when the "View" option is set to "One week") at the top of the page. This enables a spreadsheet style, which allows you to enter time in one or more cells, for one or more days. Click the Save button when you are finished and the TOTAL column will recalculate.
When typing in a time entry, you can type a number followed (spacing optional) by the word hour, hours, or the letter h, or enter just the number to record hours. Also, days and minutes can be specified by entering day, days, or the letter d (one day is eight hours), and minutes by entering minute, minutes, or the letter m, after the number (spacing optional).
To show only tasks that match a certain category, or those tasks that already have time entries for the current time period, click the Filters button in the top left. From that overlay, you can select a particular category, or check the "Hide tasks without time entries" checkbox.
Comments can be added to the time entry for a single task on a single day by clicking in the cell for a specific day (when the "View" option is set to "One week").
Click the name of the task to go to the time tray for that task in the main Projects area. There, you can enter time, comments, and Manager and Administrator users have the option to assign the time to another user. Also, the Start timer link located there can keep a timer running (in the top navigation bar) until the Stop link in the timer has been clicked. The timer will continue counting even if you navigate away from the current page.
Pinning to Timesheet
Also, you can "pin" a task to always display on the timesheet. First click on the task name in the main Projects area and, in the details tray that appears on the right, select the Time tab. Check the Pin to Timesheet checkbox, shown highlighted here:
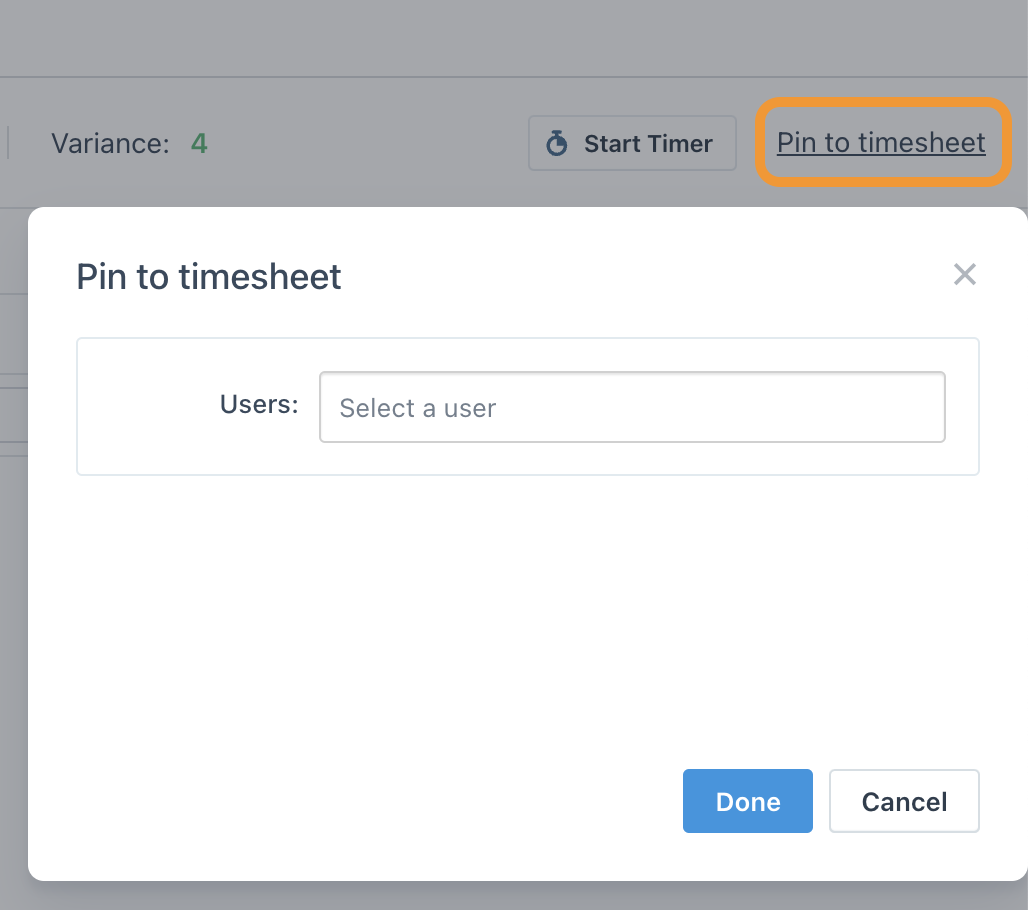
Administrators and Managers can pin a task to another user's timesheet with the Pin to timesheet link, shown below. When clicking Pin to timesheet, an overlay appears where you can enter the name of the user(s) that should have the task appear on their respective timesheets, then click Done.
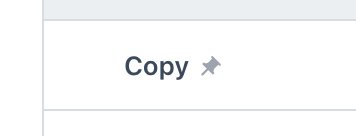
To remove the pinning of the task, the above steps can be reversed, or, on the timesheet, click the small pin icon that appear to the right of the task name, as shown here:
Video: Time Tracking Introduction


